How to Remove a Stripped Screw Without Damaging the Surface
By WowPebble Editorial
A stripped screw does not have to mean a scratched surface. Start with the right bit and gentle pressure, then work through safer removal methods.
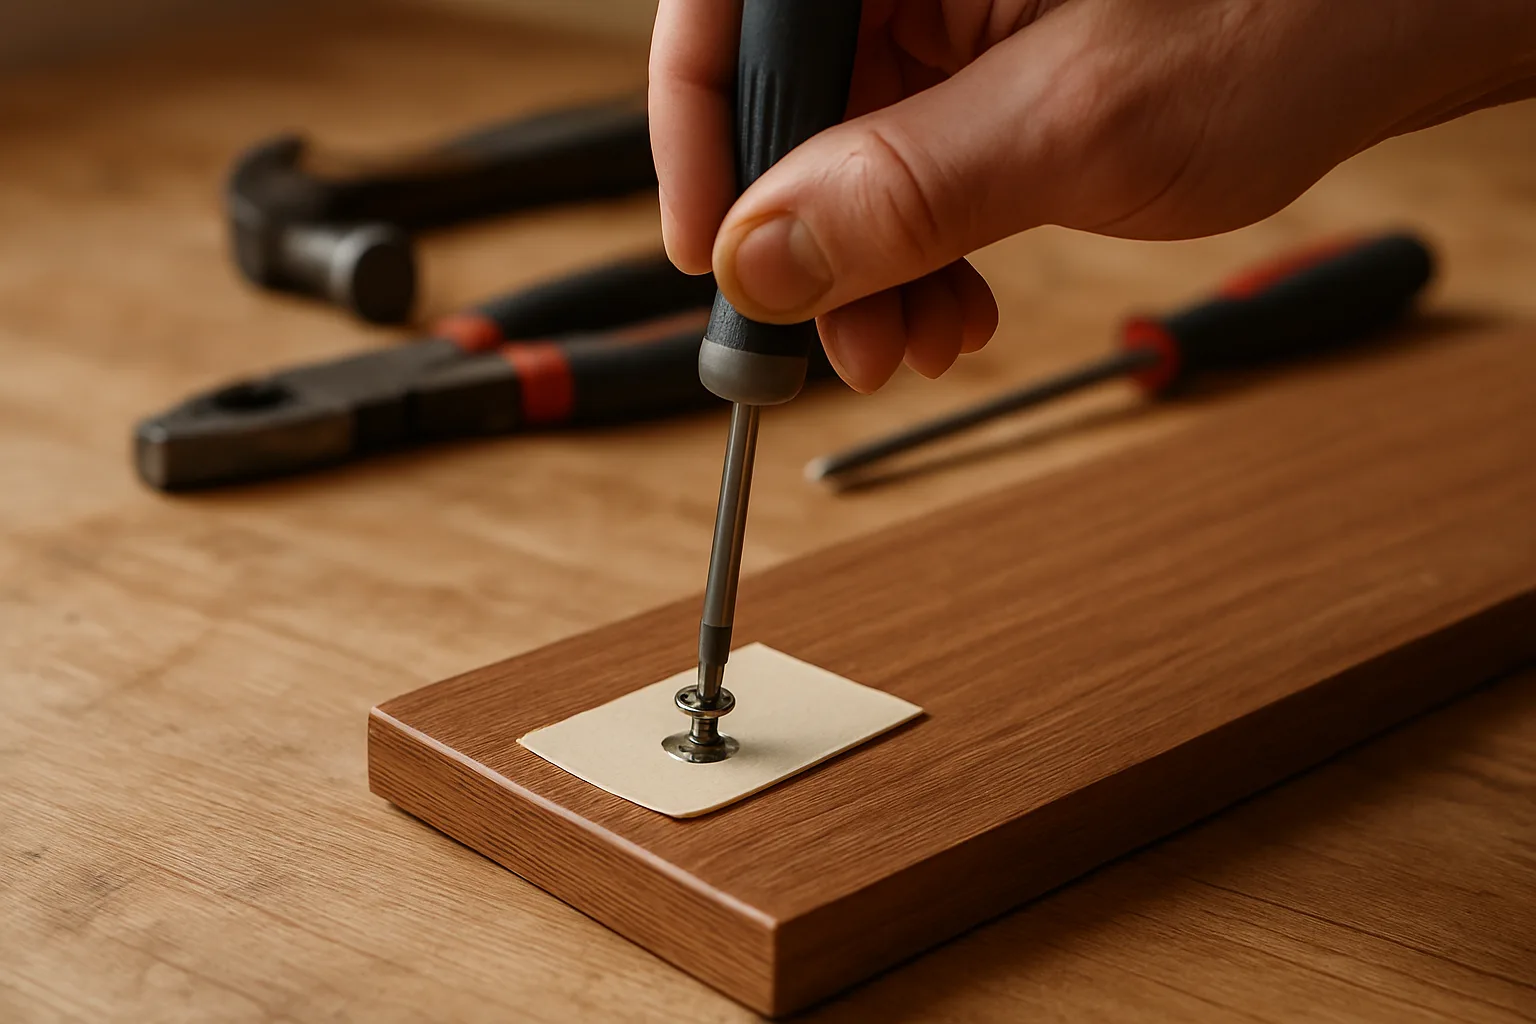
A stripped screw can turn a small repair into damage if you keep forcing the wrong bit. The steps below are for accessible, non-critical fixings in an object whose construction you understand. They are not instructions to drill into electrical equipment, a wall with unknown services, or a load-bearing or pressurised assembly. Start with a correctly fitting hand tool and stop when the next step exceeds what you can assess.
A screw head is stripped when its drive recess—the cross, star, or slot that accepts the screwdriver—has worn down enough that the bit can no longer turn it reliably. Slipping can chew up the head further, but it can also scratch the surrounding surface or push the screw deeper. Patience, a correctly matched bit, and a little protection around the work area make a big difference.
Prepare the surface and the screw
First, stop using the tool that slipped. Repeatedly trying the same loose-fitting bit usually makes the recess worse. If you are working on furniture, flooring, or another finished surface, place a thin piece of card, plastic, or painter’s tape around the screw to guard against accidental scratches. Keep any covering flat so it does not get caught under the tool.
Clear loose debris you can remove without gouging the surface. Before any drilling step, identify what is behind the screw and whether the part may safely be released. Disconnecting an appliance is not permission to dismantle it; stored energy and hidden components can remain. For uncertain equipment or wall fixings, use the maker's service procedure or a qualified repairer.
Choose a bit that fits the recess closely and fully. Phillips and Pozidriv heads can look similar, but the wrong type may wobble and slip. Torx and other star-shaped drives also need a matching bit. A clean, undamaged screwdriver bit is often more useful than a powered tool here: it gives you better control and less risk of sudden movement.
Try a better grip first
Seat the correct bit firmly in the head. Push straight down while turning slowly by hand, using steady pressure rather than a sudden twist. If the screw begins to move, keep the bit aligned and continue gently. Once it loosens, you can usually turn it out with less pressure.
If the recess is only slightly worn, a wide rubber band can sometimes help. Lay a flat section over the screw head, press the screwdriver into it, and turn slowly. The rubber may fill small gaps and give the bit extra purchase. This is a quick, low-risk try, but it will not rescue a badly rounded head. Stop if the band tears or the driver still slips.
These non-cutting options are also illustrated in iFixit’s original stripped-screw guide. They are attempts to recover grip, not a guarantee of removal. Stop as soon as the bit fails to catch; cutting, drilling and glued-in drivers introduce different risks and are not automatic next steps.
For a screw with a raised head, locking pliers may grip its sides. Adjust them so they clamp tightly, then rotate in small, controlled movements. This method is unsuitable for a flush or countersunk screw, and the jaws can mark nearby material, so shield the surface and use it only when there is enough exposed head to grip.
Improve the recess without enlarging the damage
Sometimes a larger bit fits a worn recess more securely, but forcing an oversized bit can split the head or slip onto the surface. Test a bit that is only slightly larger, by hand, and use it only if it seats firmly without rocking. A flat-blade screwdriver may also catch across a damaged cross-shaped recess if there is a straight groove left to engage. Keep the tool centered and apply gentle pressure.
Avoid reaching for an impact driver as a first response. Its sudden bursts of torque can make a bit jump, damage the screw head, or mark the workpiece. A drill can be useful later, but at this stage a hand tool lets you feel whether the bit is holding.
Use a screw extractor for a badly stripped head
Choose an extractor only after identifying the fastener and reading that exact set's instructions. Use its size chart and preparation method, not a guessed universal pilot-hole diameter or depth. Secure the workpiece and use the tool's specified protective equipment; keep hands and loose items away from the rotating tool.
Extractor designs differ. For example, the Trend PRO GRABIT instructions distinguish burnishing a damaged screw head from extracting a broken bolt. The screw-head preparation is explicitly not a drilling operation. A generic instruction to drill first would be wrong for that step.
If you cannot select the correct method, cannot inspect what lies behind the fixing, or the tool will not engage under its stated procedure, stop and use a competent repairer. Do not increase force or invent a depth to make an unidentified set work.
When drilling out the screw is the last resort
Removing a screw head destructively can also release the attached part or damage the hole underneath. It should not be the default escalation from a slipping hand tool. Whether it is feasible depends on the fixing, its job and the material around it.
For a delicate finish, concealed assembly or fixing that still will not release, have the removal and subsequent repair assessed. A generic drill-bit size cannot establish a safe procedure for the object in front of you.
Common mistakes to avoid
Do not keep turning a slipping screwdriver, push at an angle, or use a bit covered in oil or debris. Each can reduce grip. Avoid prying under the screw head with a knife or chisel near a finished surface; one slip can leave a gouge. Household adhesives are also unreliable for this job and can leave residue or bond the tool to the workpiece.
If the screw is rusted or stuck, extra turning force may not be the answer. A suitable penetrating oil can help on metal fasteners, but it may stain wood, paint, or other finishes. Test it somewhere inconspicuous and use very little, keeping it away from materials it could damage.
Make the next repair easier
Once the screw is out, inspect the hole and the fastener before replacing it. Use a new screw of the correct size and drive type, and avoid overtightening. A screwdriver or drill bit that fits snugly is less likely to slip. When using a drill, start at low speed and stop when the screw is seated rather than driving it hard into the material.
The safest removal method is usually the least dramatic one: match the bit, keep it straight, protect the surface, and apply controlled pressure. Escalate only when the screw gives you a reason to. That approach preserves both the workpiece and your options if the first try does not work.
You might also like
What to Keep in a Home Kit for a Power Outage
Build a practical outage kit with lighting, charged power banks, water, easy-to-eat food, essential medicines and supplies suited to your household.
How to Clean a Humidifier and Stop Mineral Buildup
Clean your humidifier regularly to remove scale and reduce residue. Learn how to descale it safely, care for filters and prevent mineral buildup.
How to Remove Burnt Food from a Stainless Steel Pan
Loosen burnt-on food from a stainless steel pan with hot water and gentle scraping. For stubborn residue, add baking soda and scrub without damaging the finish.