How to Remove Crayon Marks from Painted Walls Without Damage
By WowPebble Editorial
Crayon marks can usually be lifted from painted walls with mild soap and a soft cloth. Learn a careful, low-risk method—and what to avoid.
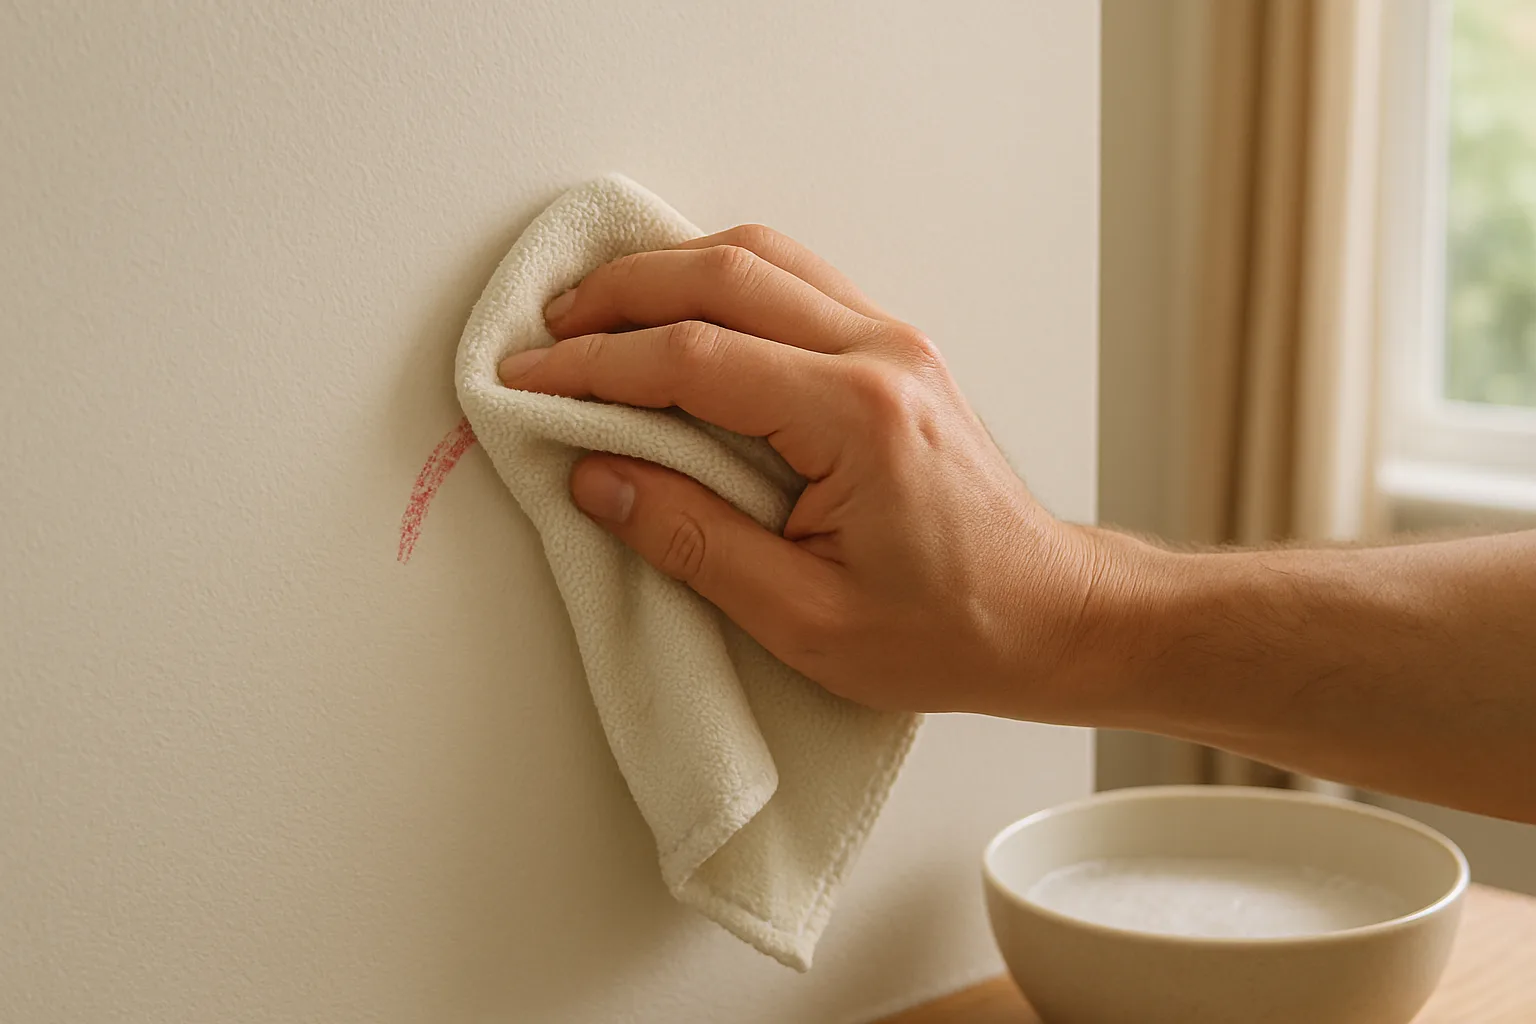
Crayon on a painted wall looks like a small disaster, but it usually does not require a harsh cleaner or a fresh coat of paint. Crayons leave a waxy mark, so the safest first step is to lift away any excess and clean gently with mild dish soap and a soft, damp cloth. The key is patience: too much pressure, water, or scrubbing can damage the paint more readily than the crayon does.
Why crayon takes a little care
A crayon mark is not quite like pencil or washable marker. Its waxy binder helps the colored material cling to a surface, and rubbing hard can spread the mark or work it into the paint’s texture. Painted walls are also not all alike. Glossy finishes tend to be more washable, while flat or matte paint can show shiny patches, scuffs, or fading if it is scrubbed.
That means there is no single cleaner that is equally safe for every wall. The wall’s paint finish, age, and condition matter, too. Treat cleaning as a small test: start with the gentlest method, work in a hidden spot first, and move on only if the paint looks unchanged once dry.
What you’ll need
Gather a soft microfiber cloth or clean sponge, warm water, and a small amount of mild dish soap. Keep a second cloth or sponge handy for rinsing, along with a dry towel. A plastic card or plastic scraper may help lift any raised crayon without scratching the wall.
Avoid scouring pads, stiff brushes, and rough paper towels. They can abrade paint or leave marks, especially on a matte finish. Do not start with bleach, paint thinner, acetone, or other strong solvents; these can discolor, soften, or remove paint. Melamine foam erasers and abrasive powders can also dull or wear the finish, so they are not a reliably damage-free shortcut.
A gentle step-by-step method
1. Test a hidden area. Mix a little dish soap into warm water. Dampen a cloth, wring it out well, and lightly wipe a small, inconspicuous patch of the same wall. Let it dry fully. Check for color transfer, a change in sheen, or a roughened surface before cleaning the visible mark.
2. Lift off any raised wax. If the crayon has left a ridge, gently ease it away with the edge of a plastic card. Keep the edge nearly flat against the wall and use light pressure. Skip this step if the mark is flat; scraping is not necessary and could scratch the paint.
3. Blot and wipe with soapy water. Dip the cloth in the solution and wring it out until it is damp, not dripping. Press it against the mark briefly, then wipe gently from the outside of the mark toward the center. This helps avoid spreading colored residue over a larger area. Rinse the cloth as it picks up color, and use a clean section each time.
4. Rinse away soap. With a second cloth dampened in plain water and wrung out well, lightly wipe the cleaned area. Soap left behind can attract dust or make the spot look different from the surrounding wall.
5. Dry and inspect. Pat the area dry with a soft towel. Wait until the wall is completely dry before deciding whether the mark remains; a damp patch can look darker or shinier than the rest of the paint. If needed, repeat the gentle cleaning once rather than scrubbing harder.
If the mark does not come off
Some marks are stubborn, particularly if they have been rubbed into a textured surface or left for a long time. First, check that the cloth is clean and the soap solution is fresh. A second gentle pass may help. If it does not, stop before the wall’s finish begins to change.
You can try a product specifically labeled as safe for painted walls, but follow its directions and test it in a hidden spot first. Do not mix cleaning products. If you are unsure what the paint can tolerate, ask a paint or hardware professional for advice based on the finish and product label.
For a mark that remains after careful cleaning, a small touch-up with matching paint may be the better fix. If possible, use paint from the original can. Even matching paint can look different when applied to a wall that has aged, so test a small area and allow it to dry before touching up the full mark.
Common mistakes to avoid
Scrubbing harder as the mark fades. This can remove paint or leave a polished-looking patch. Use light pressure and repeat only if the finish still looks normal.
Soaking the wall. Excess water can seep into seams, soften the paint, or affect the surface beneath it. A well-wrung cloth is safer than spraying cleaner directly onto the wall.
Using an abrasive eraser without testing. Melamine foam can remove surface marks, but it works by abrasion and may dull paint. If you choose to try one, use minimal pressure on a hidden test area first. Avoid it on delicate or flat finishes unless you are prepared for a possible change in sheen.
Applying heat or oily household products. Heat can soften wax and make it smear, while oils may leave a residue that is difficult to remove. Neither is a dependable first choice for a painted wall.
Keep future marks easier to handle
If crayons are within reach of young artists, washable crayons or a drawing surface such as paper, a chalkboard, or an easel can make cleanup simpler. For an existing wall mark, deal with it gently rather than waiting until it is deeply rubbed in—but do not panic if it has dried. A soft cloth, a little mild soap, and a light touch are the best place to start.
The practical rule is simple: remove loose wax first, test before cleaning, and use the least aggressive method that works. Most crayon marks are easier to manage when the wall’s paint is treated as carefully as the mark itself.
You might also like
How to Remove Candle Wax from Fabric Without Damaging It
Candle wax can look like a permanent stain, but the right order makes removal easier: harden it, lift the excess, then treat any residue carefully.
How to Remove Sticker Residue from Glass Without Scratching It
Lift stubborn sticker glue from windows, jars, and mirrors with gentle methods that soften the adhesive and protect the glass from scratches.
How to Remove Water Rings from Wood Furniture Without Making Them Worse
A pale water ring may involve the finish, but colour alone cannot diagnose it. Check the surface and care guidance before trying a treatment that could worsen it.